Some people hate it.. some people cherish it as a means to eternalize their brilliant designs… DOCUMENTING. One way or the other, in the bigger projects you can easily fill up a local library with all the paper produced. That’s why a good solution design is crucial in these projects. If such a design covers 1 system like AX, it’s easier to come to a holistic view on the desired solution. But what if your solution spans across multiple systems, all requiring some installation, configuration and customization. How do you keep the overview without getting lost in the details? For this situation your solution design needs an extra helper: the UML sequence diagram:

In this blog I’ll publish you my personalized “UML Sequence Digram +”. It doesn’t ‘just’ show the sequence of flows as a UML Sequence Diagram typically does, but it highlights all of the following elements which together form your entire solution:
- Installation elements (highlighted in brown)
- Configuration elements (highlighted in red)
- Customized elements (highlighted in purple)
- Interface elements (highlighted in green)
- Business tasks and automated process tasks (highlighted in blue)
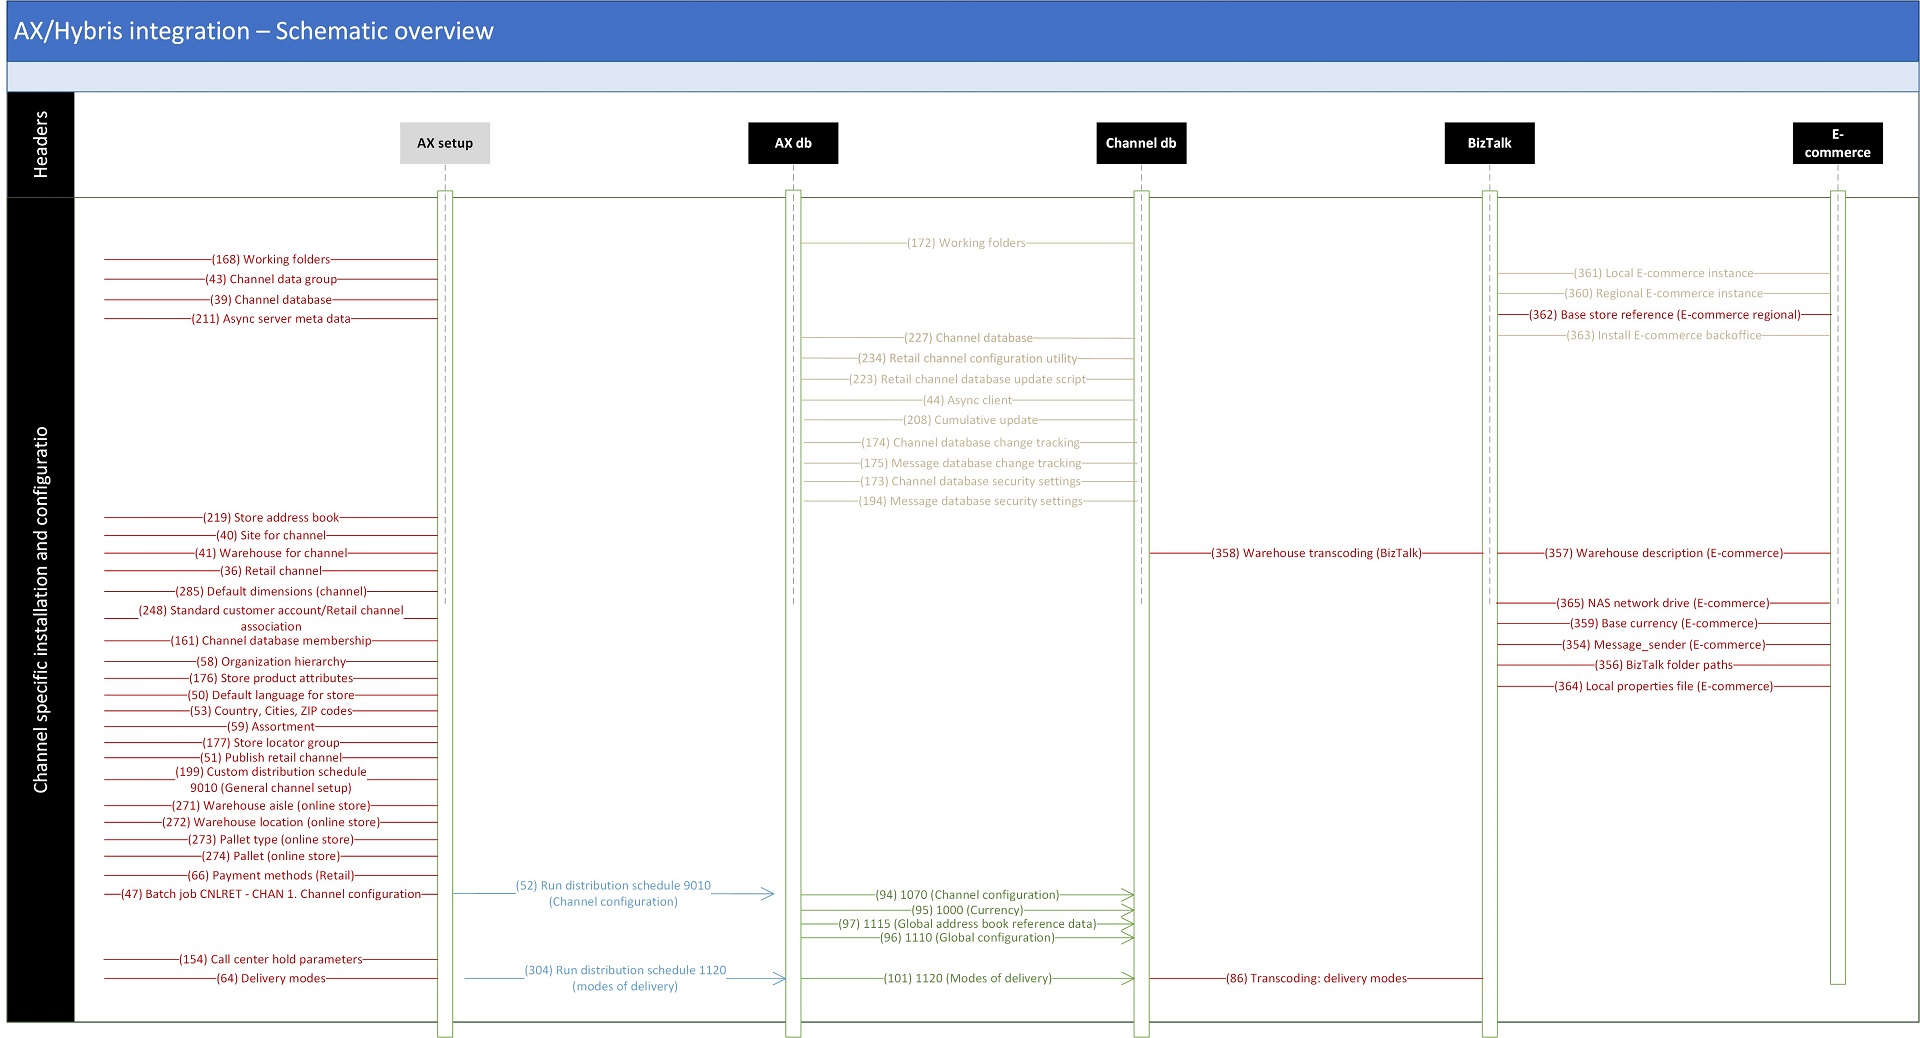
Below you find two examples of the “UML Sequence Diagram +”, 1 for deploying the integration of a 3rd party online store with Dynamics AX 2012 R3 Retail and 1 for a specific interface flow of this integration (the item price flow).
 Example 1: deployment of a 3rd party sales channel
The advantage of this diagram is that when you’re fully into the process of shaping and prototyping your solution, you can quickly keep your documentation in sync by only adding elements to the diagram with a specific ID and meta data. How? The UML Sequence Diagram is a Visio template (download link) which is baselined by a connected Excel template (download link). In this Excel template you create the elements and all meta data which you want to store for the elements. If you want to change the name of your element you can do it quickly in Excel – the Visio template is only for having the graphical overview of all the elements. I also have the habit of saving screenshots to a file location with the ID of the element and a suffix number (in case of multiple screenshots per element).
The templates are especially helpful in agile projects and environments where customer requirements tend to change on daily basis. You can postpone the moment on which you descend into fully detailed installation guides, setup guides etc. until you have confirmation from the customer about your design and/or prototype. And if you chose your level of meta data registration well enough, you have collected just enough details to provide very thorough documentation without the risk on leaving out any details.
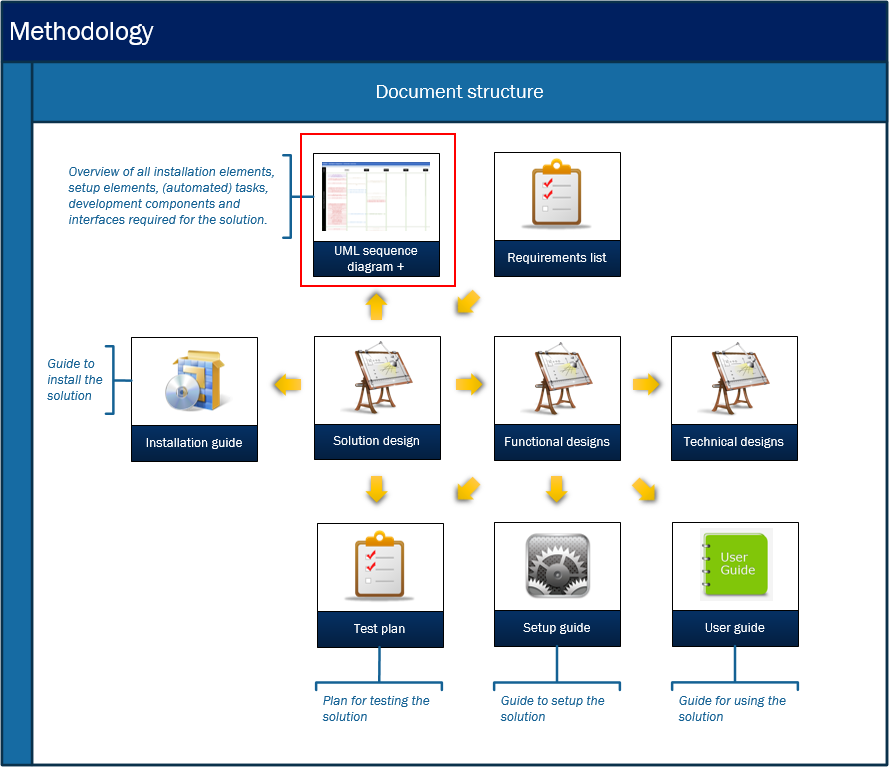
All the related final documentation will follow the structure of the UML sequence diagram. Here’s an example for an installation guide (download link) which fits to example 1 above – Note the element IDs between parentheses:

This approach also saves people from having to dig through a linear document in order to find what they want to know. They can identify the specific element which they’re interested in and quickly descend into the right document and element section by the color of the element and the ID of the element.
I hope this will help you improving the overall quality of your documentation and managing your document libraries in general.
Happy DAX’ing!
Patrick


